-
[Ansible] 보안설정/모니터링 자동화, Semaphore (스터디 4주차)Infra/Cloud 2024. 2. 13. 14:02
벌써 이번 Gasida Ansible 스터디의 마지막 주차이다. 이번주 주제는 보안설정/모니터링 자동화, Semaphore이다. 보안설정과 관련된 내용은 전직장에서 진행했던 인프라 취약점진단과 연관이 크기때문에 굉장히 친숙했다.
인프라 취약점 진단을 업으로 하시거나 취약점을 조치하는 인프라 담당자, 개발자, 보안담당자 등 관련이 있는 분들은 모든 진단 항목에 사용하는 것은 쉽지 않지만 자신이 처한 환경에서 Ansible 활용이 가능한 선까지는 충분히 편리함을 맛볼 수 있을 것이라고 생각한다.
개인적으로는 대부분의 기업이 SSH Port는 mgmt로 열어놓았을 가능성이 있으므로 어느정도 활용이 가능할 것이라고 생각한다. 특히 나의 보안 컨설팅 경험상 보안팀의 규모가 작은 기업일수록 소수의 인원이 반복작업으로 인해 공수를 많이 뺏기기 때문에 조치라던지 보안설정 등의 대비가 미흡한 경우가 많다. 따라서 Ansible를 이용하여 한번만 잘 만들어 놓는다면 큰 시간적 이득을 볼 것 같다.
Semaphore
- semaphore란 코드관리와 여러사람이 같이 ansible을 관리할 때 사용할 수 있는 오픈소스이다.
Introduction - Semaphore Docs
Semaphore is written in pure Go and available for Windows, macOS and Linux (x64, ARM, ARM64). Semaphore is an open-source project with concise and high-quality code.
docs.semui.co
- semaphore 구축방법
wget https://github.com/ansible-semaphore/semaphore/releases/download/v2.9.45/semaphore_2.9.45_linux_amd64.deb
sudo dpkg -i semaphore_2.9.45_linux_amd64.deb

How to Get Slack Webhook URL | Svix Resoures
Webhooks in Slack offer an easy and direct way to communicate real-time information to Slack from third-party applications. By following these steps you will be able to obtain the Webhook URL for Slack notifications. Let's get started!
www.svix.com
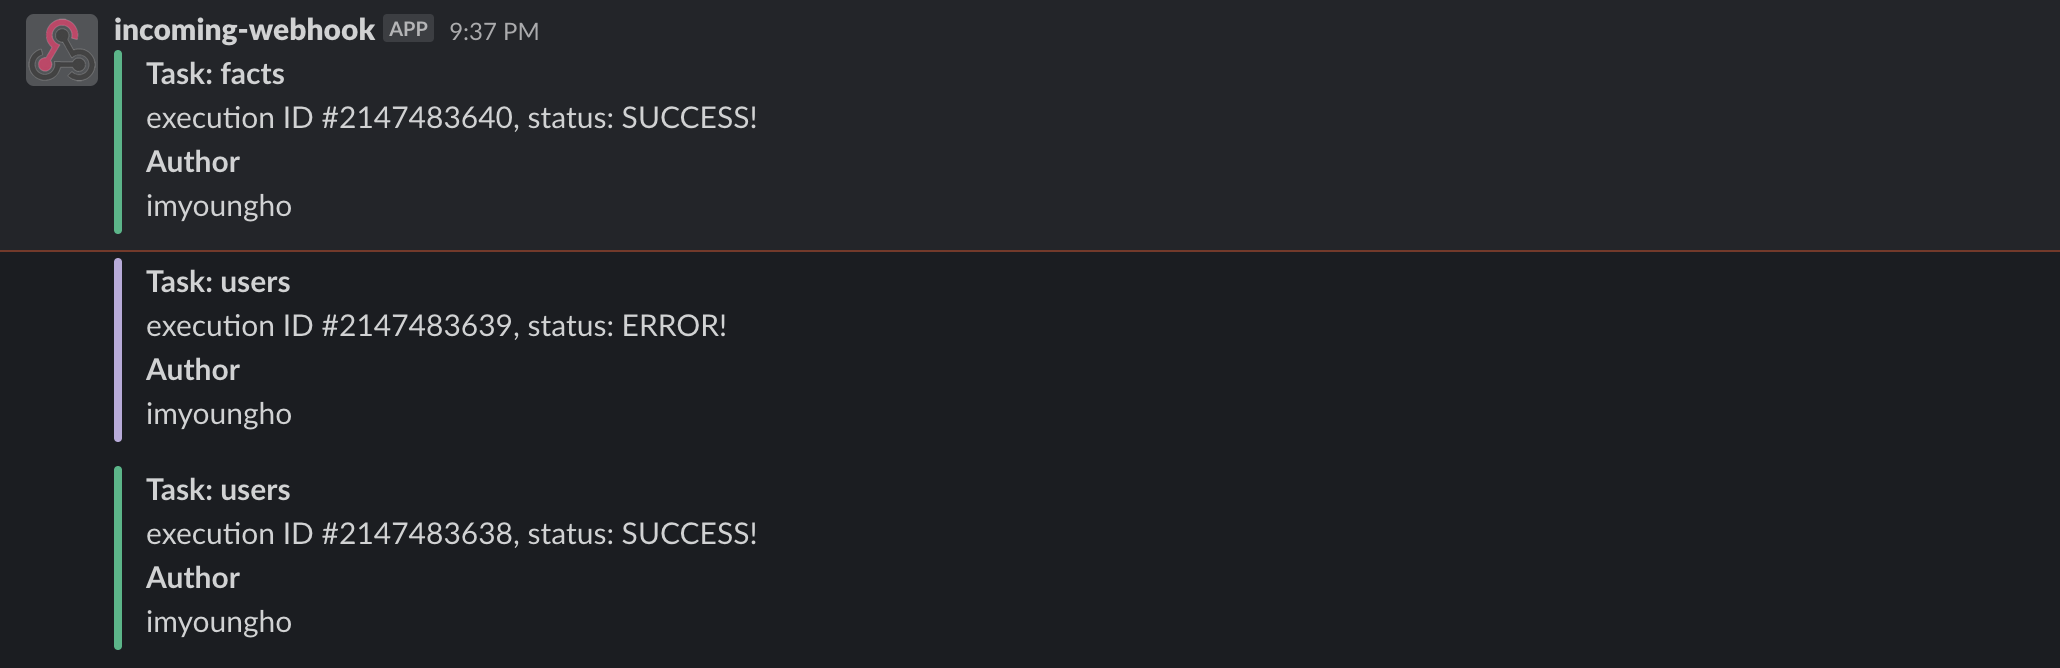
=> 설치 시, Slack 알람과 Slack webhook URL을 등록해주었다. 등록 시, 해당 channel에서 incomming-wehbook이 설정된 것을 확인할 수 있었다(slack wehbook 설정은 위의 URl 참고)
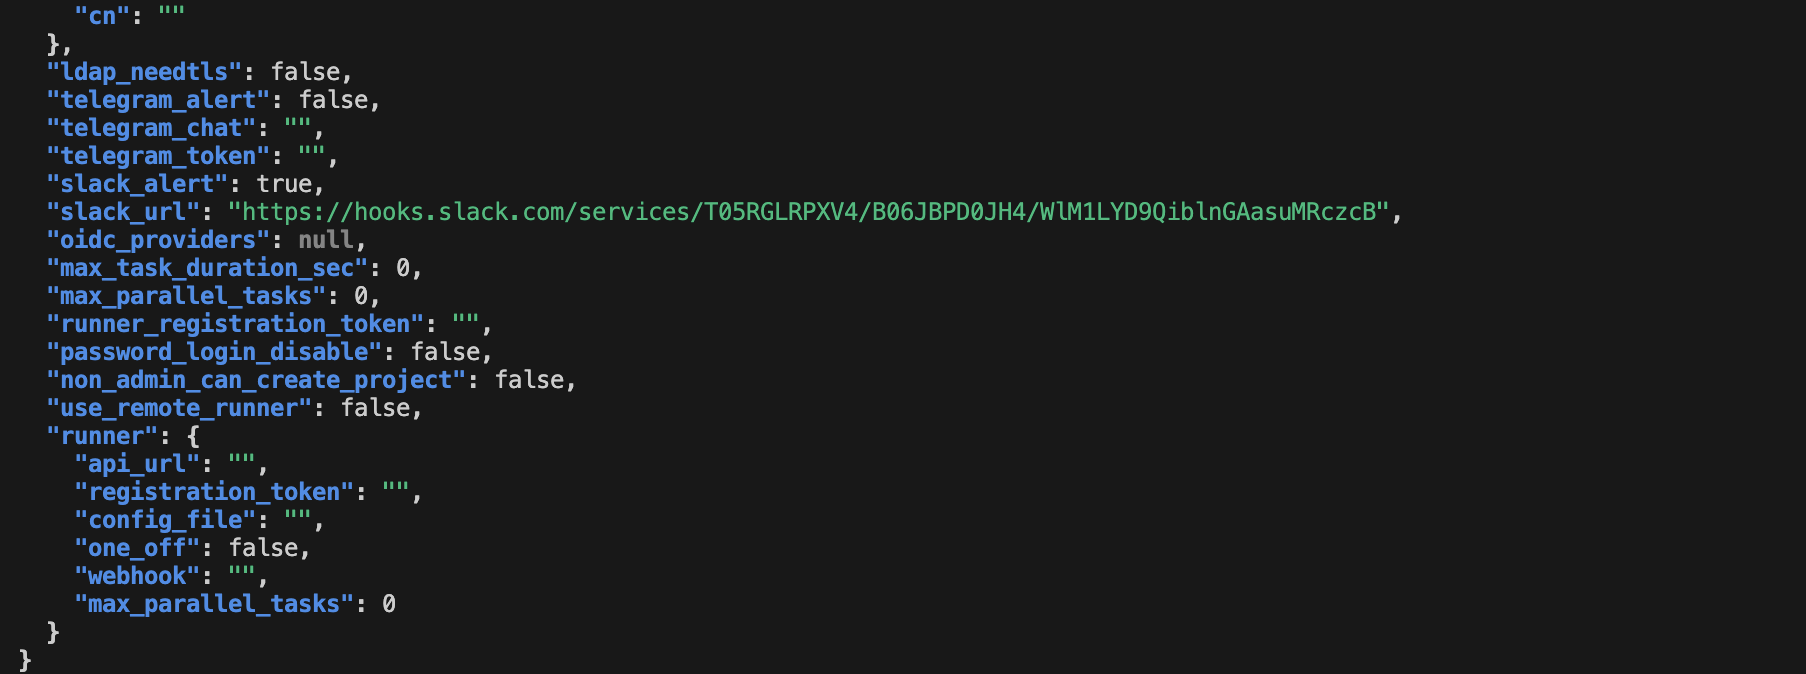
semaphore service --config=./config.json
=> 또한 설정이 완료되면 config.json 파일이 생성되며 해당 파일을 통해 seamphare를 실행해주면 된다.


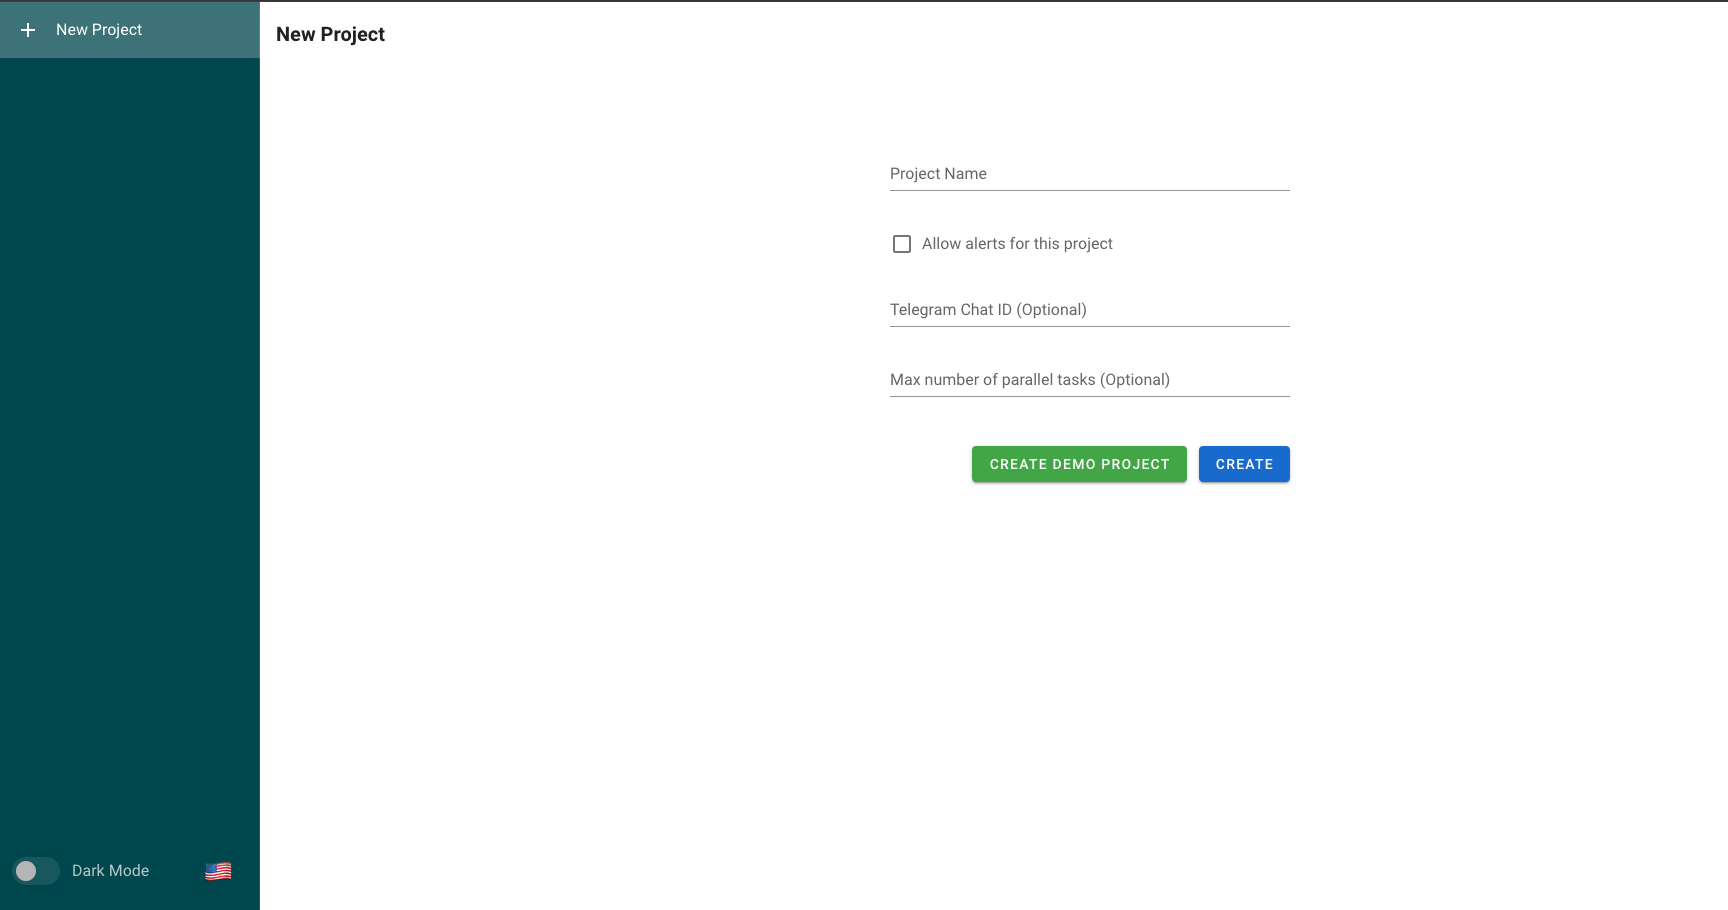
=> 3000번 포트로 semaphore가 실행중인 것을 확인할 수 있었고 위에서 생성한 계정으로 접속하면 된다.
- project & key 생성
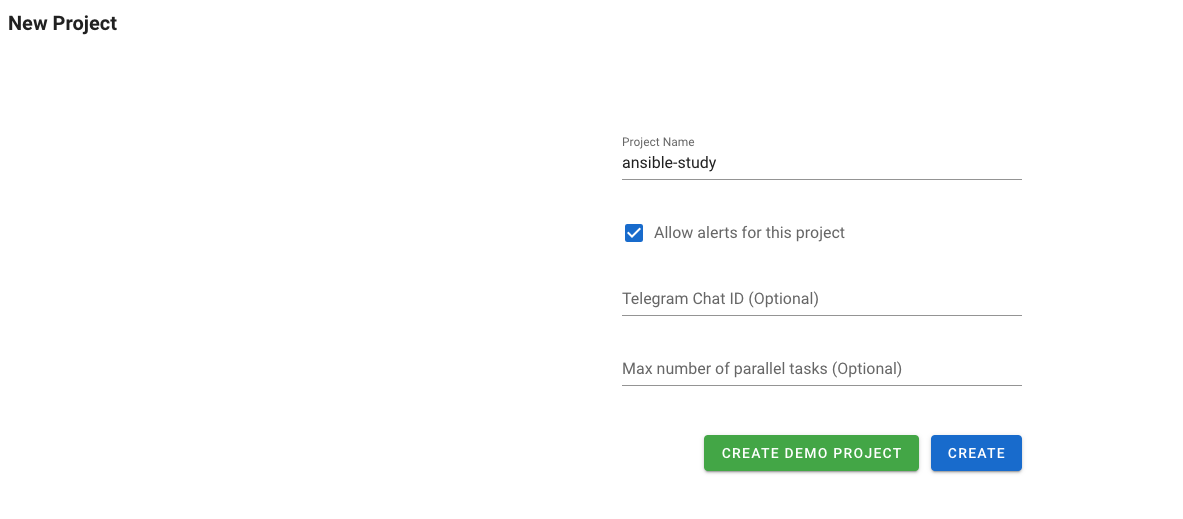


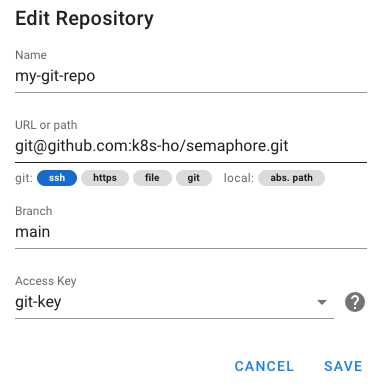
=> project를 생성하고 난 뒤 key store에서 key를 생성해준다. ssh key를 이용할 계정명과 private key값을 복사해주면 된다. key생성에는 3가지 종류가 존재하는데 위와같이 SSH key와 login password, 그리고 none type이 존재한다. none type은 보통 public github 등의 주소를 사용할때와 같이 굳이 나의 인증이 필요없는 경우 종종 사용하게되는 type이다. 스터디에서 진행한 실습에 추가로 git key도 등록해주었다.
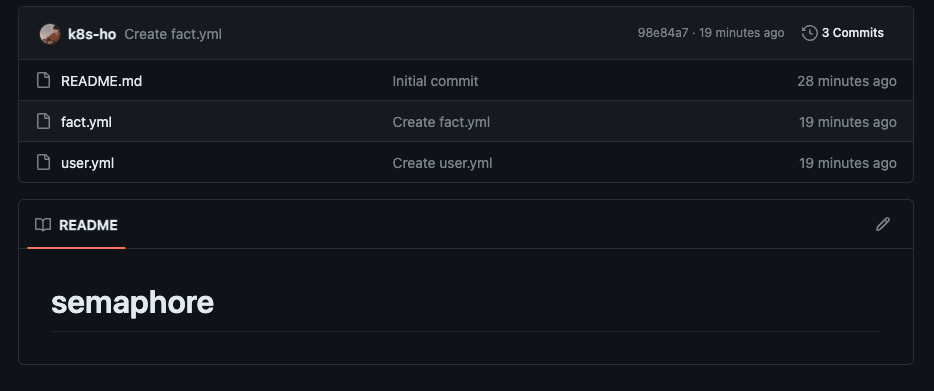
- local path뿐만아니라 git repo로도 진행해보고싶어서 별도로 추가를 해주었다. 따라서 git ssh key와 repo를 생성했다.
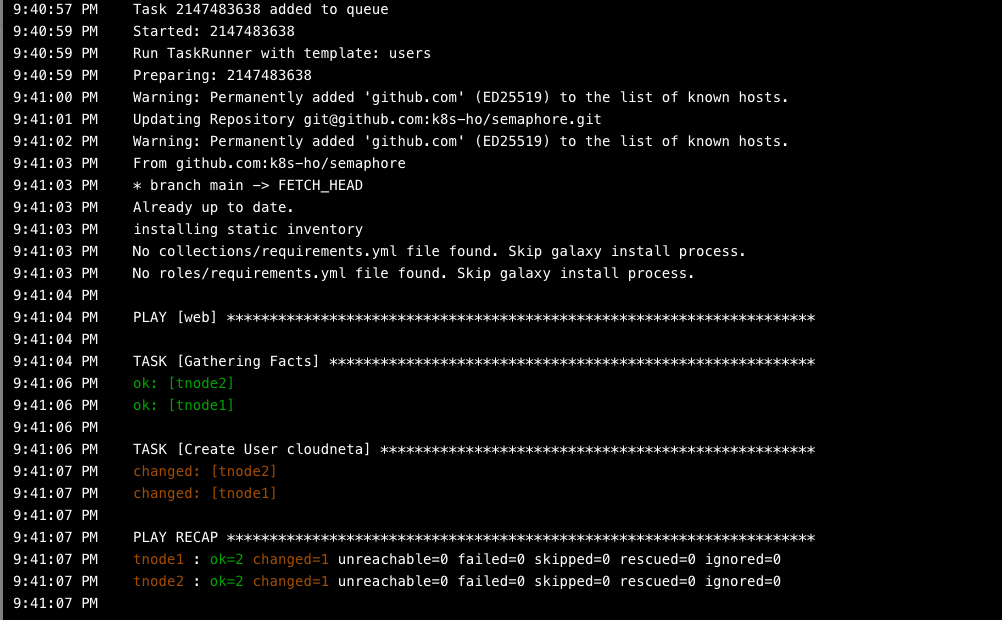

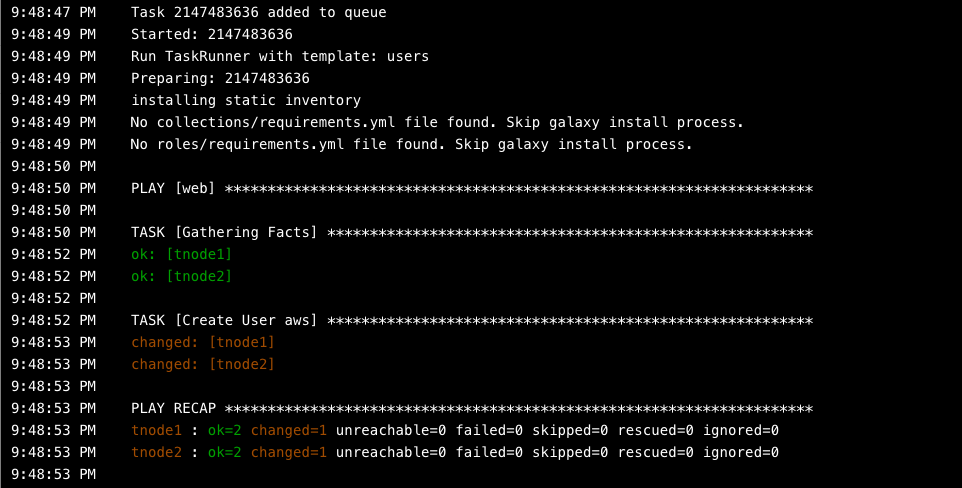
=> facts와 users Task 모두 정상적으로 성공하게 되었다.
- users task에 변수를 추가해서 진행해보았다(이번엔 local repo 이용)
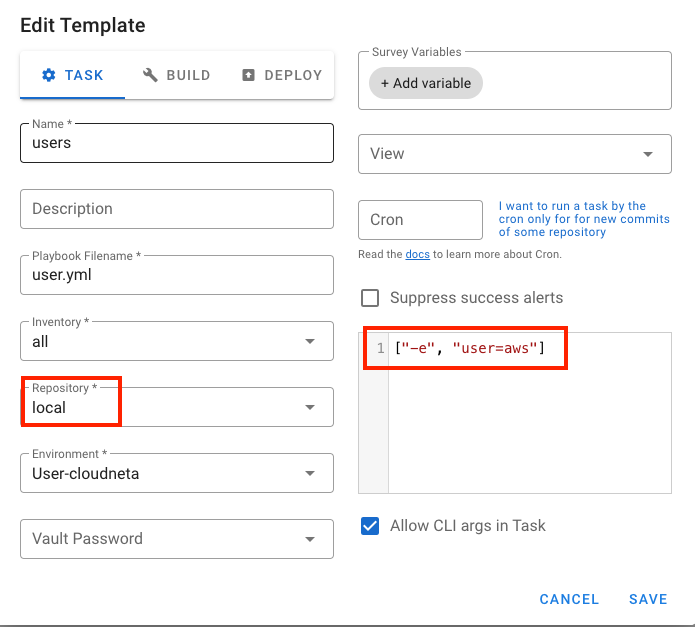
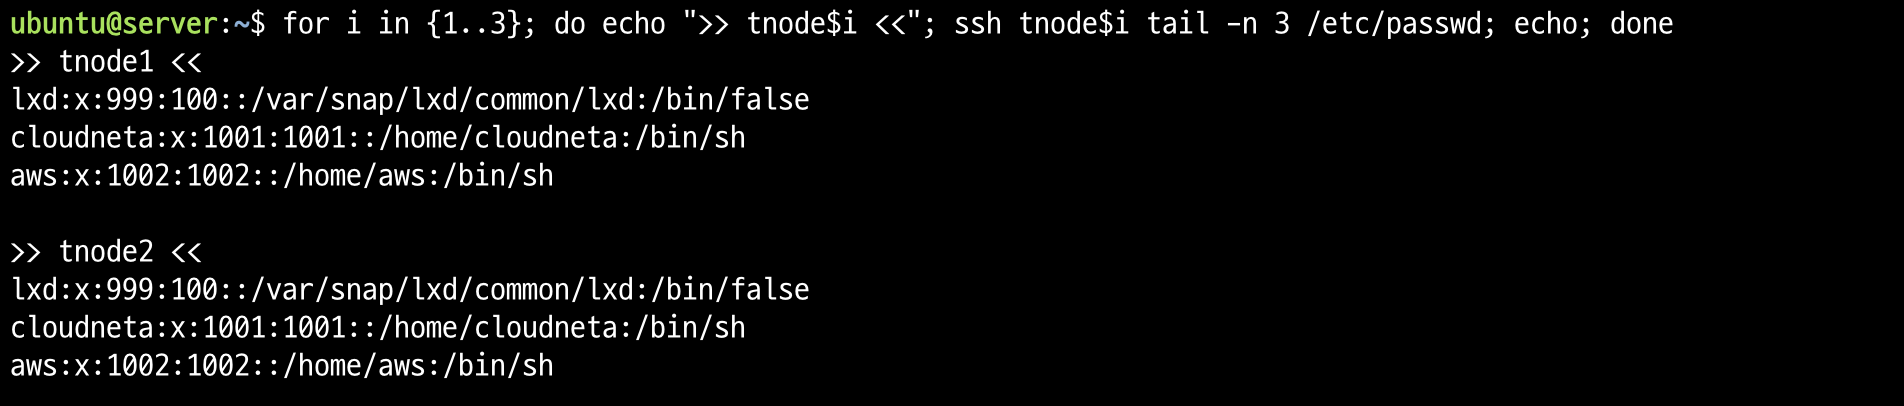
=> 기존의 cloudneta 뿐만아니라 aws계정까지 생성된 것을 확인할 수 있었다.
# 스터디 도전과제
[+] 해당 도전과제는 모두 동일한 ansible.cfg와 inventory를 사용
cat <<EOT> ansible.cfg
[defaults]
inventory = ./inventory
remote_user = ubuntu
ask_pass = false

[privilege_escalation]
become = true
become_method = sudo
become_user = root
become_ask_pass = false
EOT

cat <<EOT> inventory
[tnode]
tnode1
tnode2
tnode3
EOT
# 도전과제1
* 최신 Linux 보안 가이드를 검색하여 '계정관리 혹은 파일 디렉터리 관리'에 대한 설정확인 및 보안 설정 플레이북을 작성해보자.
[ 주요정보통신기반시설 U-01 ] root 계정 원격접속제한을 playbook으로 생성
---

- hosts: tnode2
  tasks:
    - name: Check PermitRootLogin Options
      ansible.builtin.shell: cat /etc/ssh/sshd_config | grep -i '^PermitRootLogin' | awk '{print $2}'
      register: permit_root_login_result

    - name: Process based on PermitRootLogin setting
      ansible.builtin.debug:
        msg: "PermitRootLogin is yes"
      when: permit_root_login_result.stdout == "yes"

    - name: Process based on PermitRootLogin setting
      ansible.builtin.debug:
        msg: "PermitRootLogin is no"
      when: permit_root_login_result.stdout == "no"

    - name: Change PermitRootLogin
      ansible.builtin.shell: sed -i 's/^PermitRootLogin yes$/PermitRootLogin no/' /etc/ssh/sshd_config; (cat /etc/ssh/sshd_config | egrep -i '^PermitRootLogin')
      register: result_option
      notify:
        - Print option
        - Service Restart
      when: permit_root_login_result.stdout == "yes"

  handlers:
    - name: Print option
      ansible.builtin.debug:
        msg: "After changing option: {{ result_option.stdout_lines }}"

    - name: Service Restart
      ansible.builtin.service:
        name: "sshd"
        state: restarted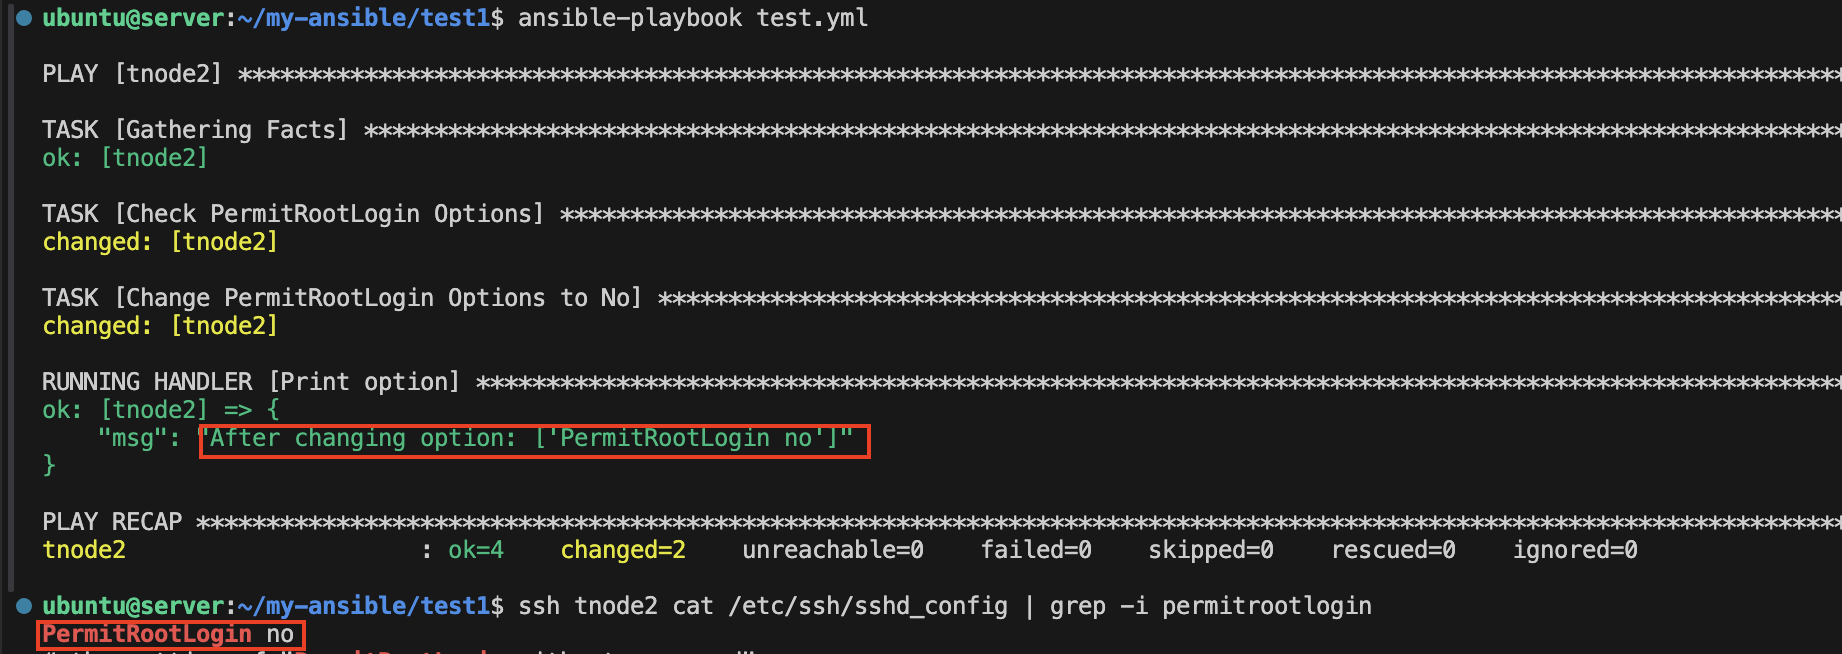

=> PermitRootLogin이 no로 변경되었으며 ssh service가 재시작되어 정상 패스워드를 입력해도 root로 로그인할 수 없게 되었다.
# 도전과제2
* 12.1의 수집 결과를 날짜와 시간이 포함된 log 파일 이름으로 저장되게 하고, Crontab을 활용하여 30분 마다 반복 실행 될 수 있게 설정해보자.
[참고] cron의 일정표현을 빠르고 편리하게 확인할 수 있는 페이지
Crontab.guru - The cron schedule expression generator
crontab.guru
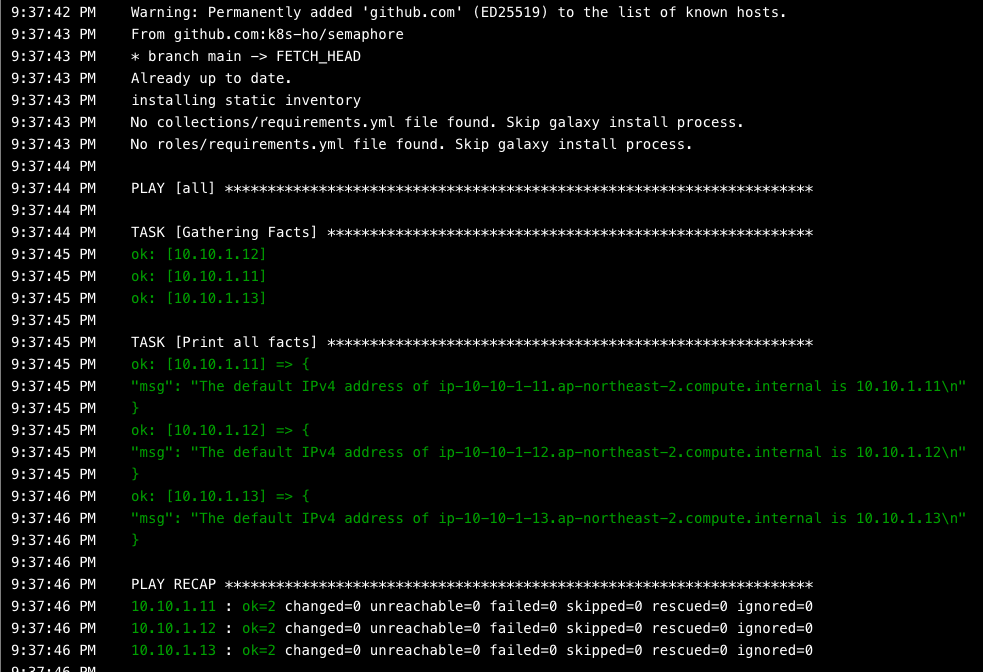
- 12.1 수집용 playbook 내용(monitoring_facts.yml)
---
- hosts: tnode
  become: true
  vars:
    log_directory: /var/log/daily_check

  tasks:
    - name: Print system info
      ansible.builtin.debug:
        msg:
        - "################ Start #####################"
        - "Date: {{ ansible_facts.date_time.date }} {{ ansible_facts.date_time.time }}"
        - "HostName: {{ ansible_facts.hostname }}"
        - "OS: {{ ansible_facts.distribution }}"
        - "OS Version: {{ ansible_facts.distribution_version }}"
        - "OS Kernel: {{ ansible_facts.kernel }}"
        - "CPU Cores: {{ ansible_facts.processor_vcpus }}"
        - "Memory: {{ ansible_facts.memory_mb.real }}"
        - "Interfaces: {{ ansible_facts.interfaces }}"
        - "IPv4: {{ ansible_facts.all_ipv4_addresses }}"
        - "Devices: {{ ansible_facts.mounts }}"
        - "################# End #######################"
      register: result

    - name: Create log directory
      ansible.builtin.file:
        path: "{{ log_directory }}"
        state: directory
        mode: '0755'

    - name: Print logs to log file
      ansible.builtin.shell: |
        echo "{{ item }}" >> "{{ log_directory }}"/$(date '+%Y%m%d_%H%M').logs
      loop: "{{ result.msg }}"
=> 날짜와 시간이름으로 .log파일 생성되도록 수정 진행
- crontab 진행용 playbook 생성(test.yml)
---

- name: Schedule playbook execution with cron
  hosts: localhost
  become: true
  tasks:
    - name: Add entry to crontab test
      ansible.builtin.cron:
        name: "Run Ansible playbook every 2 minutes"
        minute: "*/1"
        user: "ubuntu"
        job: "ansible-playbook -i /home/ubuntu/my-ansible/test2/inventory /home/ubuntu/my-ansible/test2/monitoring_facts.yml > error.log"
      notify:
        - Service Restart

  handlers:
    - name: Service Restart
      ansible.builtin.service:
        name: "cron"
        state: restarted
=> 테스트를 위해 30분이아닌 1분으로 적용, playbook 진행 시, 로그확인을 위해 error.log에 저장되도록 하여서 디버깅을 진행
- crontab 파일 확인(vi로 수정하도록 실행)
export VISUAL=vim; crontab -e
=> 상단에 해당내용이 존재하는지 확인, 없다면 작성해주자.
- playbook 진행
ansible-playbook test.yml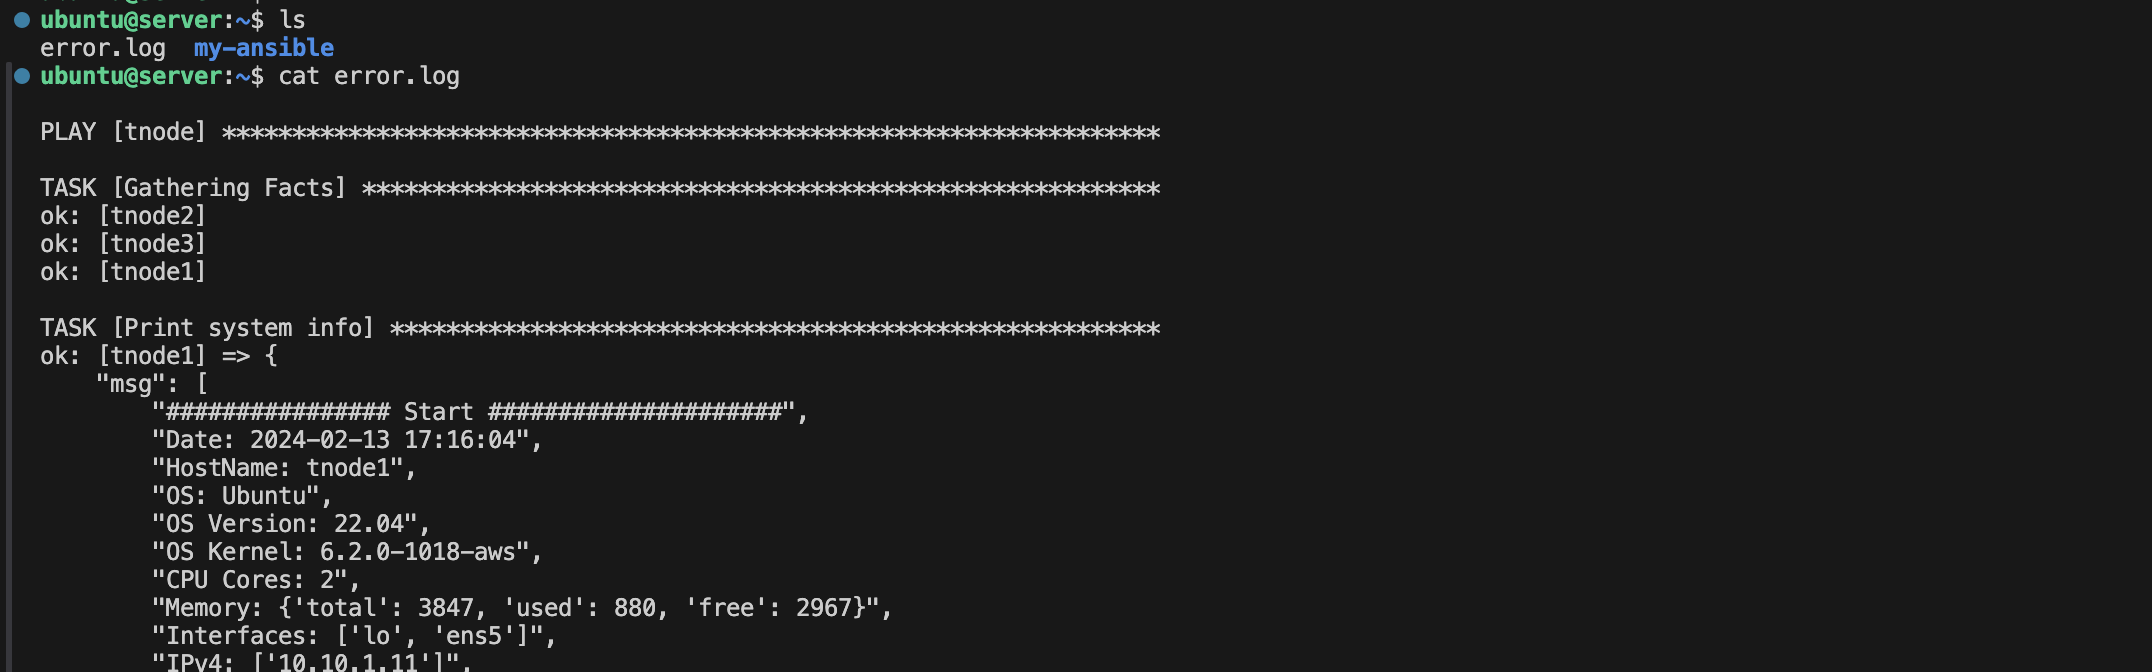
=> 1분뒤 생성되는 error.log파일을 통해 디버깅이 가능하다.
- 로그파일 생성 확인
for i in {1..3}; do echo ">> tnode$i <<"; ssh tnode$i ls /var/log/daily_check; echo; done
=> 잘동작하는 것을 볼 수 있었다.
# 도전과제3
* 12.2 플레이북에 대상 노드에 ifconfig ens5 정보를 ifconfig.log 파일로 수집 할수 있게 태스크를 추가해보자.
- playbook 생성(monitoring_system.yml)
---

- hosts: tnode
  vars_files: vars_packages.yml

  tasks:
    - name: Install packages on RedHat
      ansible.builtin.dnf:
        name: "{{ item }}"
        state: present
      loop: "{{ packages }}"
      when: ansible_facts.os_family == "RedHat"

    - name: Install packages on Ubuntu
      ansible.builtin.apt:
        name: "{{ item }}"
        state: present
      loop: "{{ packages }}"
      when: ansible_facts.os_family == "Debian"

    - name: Create log directory
      ansible.builtin.file:
        path: "{{ log_directory }}"
        state: directory

    - name: Monitoring ifconfig
      ansible.builtin.shell: |
        {{ item }} >> {{ log_directory }}/ifconfig.log
      loop:
        - ifconfig ens5
- var_packages.yml
---

log_directory: /home/ubuntu/logs
packages:
  - net-tools
=> ifconfig의 경우 net-tools에 속해있으므로 해당 package가 설치될 수 있도록 작성한다(둘다 같음)
- playbook 실행
ansible-playbook monitoring_system.yml
- 생성된 로그파일 ifconfig.log 확인
for i in {1..3}; do echo ">> tnode$i <<"; ssh tnode$i cat logs/ifconfig.log; echo; done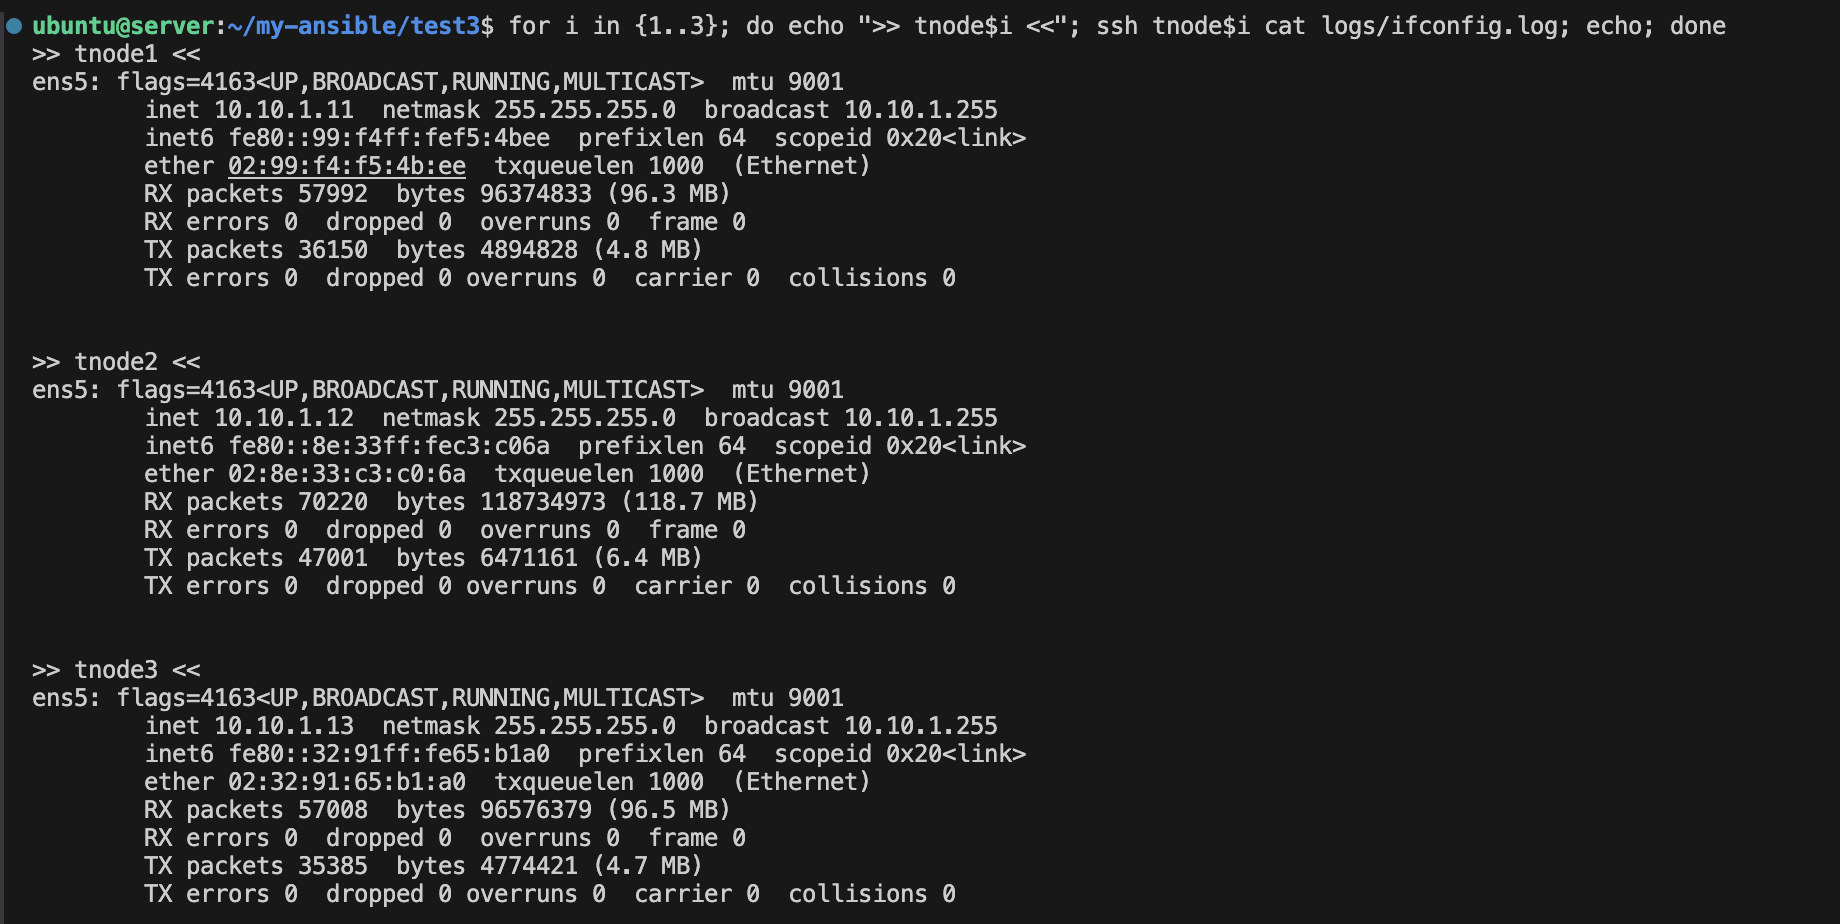
# 도전과제4(수정필요)
* 12.3 앤서블 갤럭시에서 ‘elasticsearch’ 롤을 검색하여 es와 kibana를 tnode2에 설치 후 접속해보자.
Ansible Galaxy
galaxy.ansible.com
ansible-galaxy role install -p test4/ geerlingguy.java
ansible-galaxy role install -p test4/ geerlingguy.elasticsearch
ansible-galaxy role install -p test4/ geerlingguy.kibana
=> 우선 원하는 경로에 elasticsearch role을 설치해주자. 해당 role 이용에는 geerlingguy.java도 사용되므로 설치해주자.
- playbook 정보(test.yml)
- hosts: tnode2
  roles:
    - geerlingguy.java
    - geerlingguy.elasticsearch
    - geerlingguy.kibana
- 외부 접속 허용을 위해 defaults/main.yml의 아래의 내용 수정

=> localhost -> 0.0.0.0으로 수정
- playbook 실행
ansible-playbook test.yml
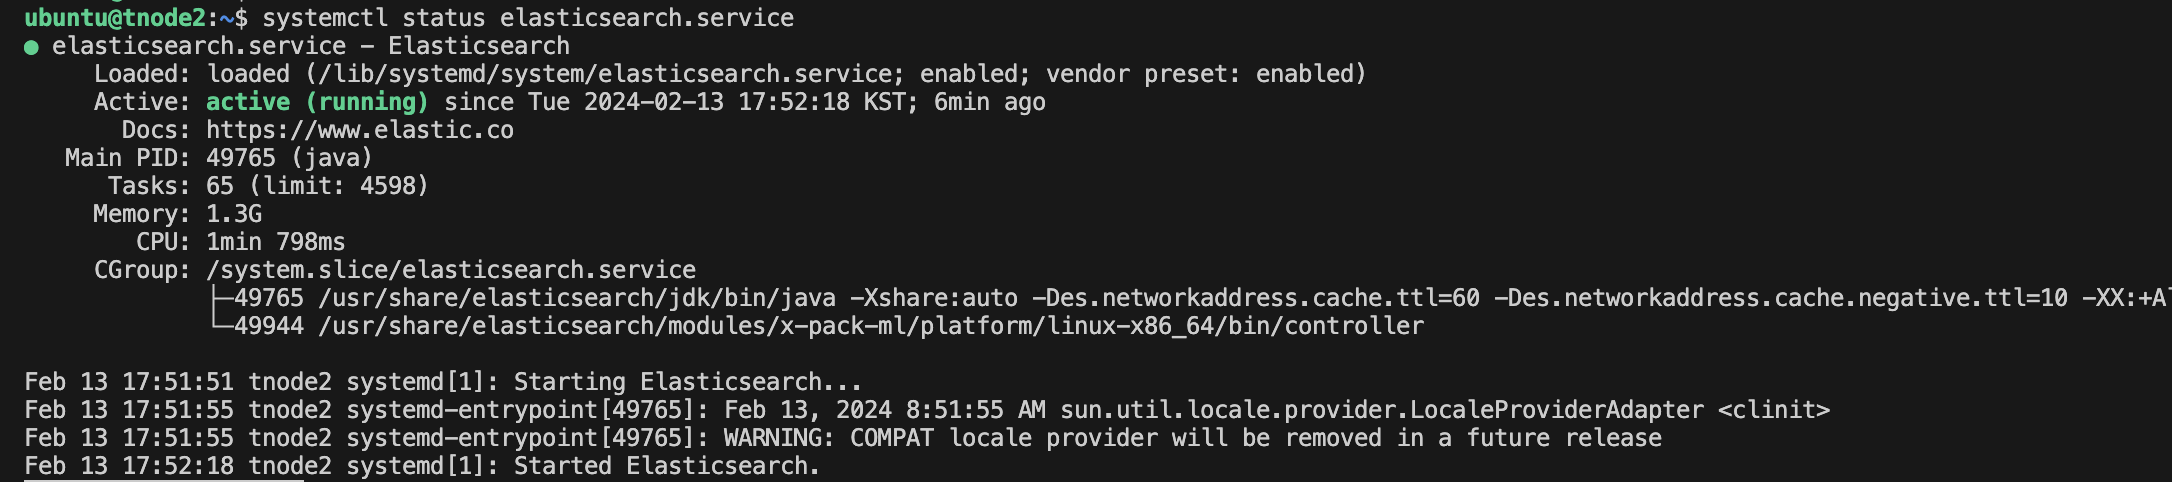
=> tnode2에 정상적으로 elasticsearch service가 구동중인 것을 확인할 수 있었다.
# 도전과제5
* Ansible로 AWS EC2를 생성해보자 → 책 18챕터-4 혹은 구글링
- Ansible을 통해 AWS 자원에 대해서도 관리가 가능하다.
- AWS SDK(Software Development Kit) 설치 - boto3(python용)
개발자 도구 - AWS에서의 구축을 위한 SDK 및 프로그래밍 도구 키트
닫기 피드백을 제공해 주셔서 감사합니다. 피드백은 AWS 경험을 개선하는 데 도움이 됩니다. 피드백에 대한 자세한 정보를 제공하려면 아래의 피드백 단추를 클릭하세요.
aws.amazon.com
Code Examples - Boto3 1.34.39 documentation
Previous A Sample Tutorial
boto3.amazonaws.com
- python & boto3 설치 진행
sudo apt install python3-pip && sudo pip3 install boto3- 변수파일 생성(vars.yml)
---

vm_name: test-server
image_id: ami-0382ac14e5f06eb95
instance_type: t3.medium
key_name: k8s-ho
security_group: sg-0d51cf0c124a82c80
region_name: ap-northeast-2
vpc_subnet_id: subnet-0877b12ded9efc29d
- playbook 파일 생성(test.yml)
amazon.aws.ec2_instance module – Create & manage EC2 instances — Ansible Documentation
session_token aliases: aws_session_token, security_token, aws_security_token, access_token string
docs.ansible.com
---

- hosts: localhost
  vars_files: vars.yml

  tasks:
    - name: Create ec2 vm
      amazon.aws.ec2_instance:
        name: "{{ vm_name }}"
        image_id: "{{ image_id }}"
        instance_type: "{{ instance_type }}"
        key_name: "{{ key_name }}"
        security_group: "{{ security_group }}"
        network:
          assign_public_ip: true
        region: "{{ region_name }}"
        vpc_subnet_id: "{{ vpc_subnet_id }}"
      register: vm_info

    - name: Print vm information
      ansible.builtin.debug:
        var: vm_info
=> 기존예제는 실행이 안되어서 ansible 예제를 확인해보니 vpc_subnet_id가 없어 추가해주었다.
- ansible-playbook을 통해 생성된 EC2 확인


=> 위에서 설정한대로 생성된 것을 확인할 수 있었다.
반응형'Infra > Cloud' 카테고리의 다른 글
[Ansible] 시스템 구축 및 환경 설정 자동화(스터디 3주차) (2) 2024.01.31 [Ansible] 반복문과 조건문, Roles(스터디 2주차) (0) 2024.01.19 [Ansible] 환경구축 및 기본사용(스터디 1주차) (0) 2024.01.10 [AWS] LocalStack이란? (4) 2023.12.04 [AWS] Lambda와 Nodejs 이용한 영화 예매순위 알람 서비스 (0) 2023.12.04 댓글